Admin Training
We are so excited to have you joining the CanZell family! Below is the training you will need to succeed at your position!
Let's Get Started!
New Employee Onboarding
Purpose:
To ensure all new employees are correctly onboarded into Homebase, Slack, and GoHighLevel, so they have access to necessary systems, can log work hours accurately, and are set up for payroll and communication.
Scope:
This SOP applies to all HR and administrative staff responsible for onboarding new employees.
1. SET UP HOMEBASE (TIME & PAY)
Homebase is how your work hours are tracked and how you get paid.
What to do:
1. Open the Homebase invite emailClick
2. Accept Invite
3. Create your password
4. Log in successfully

2. Once set up, you will use Homebase to:
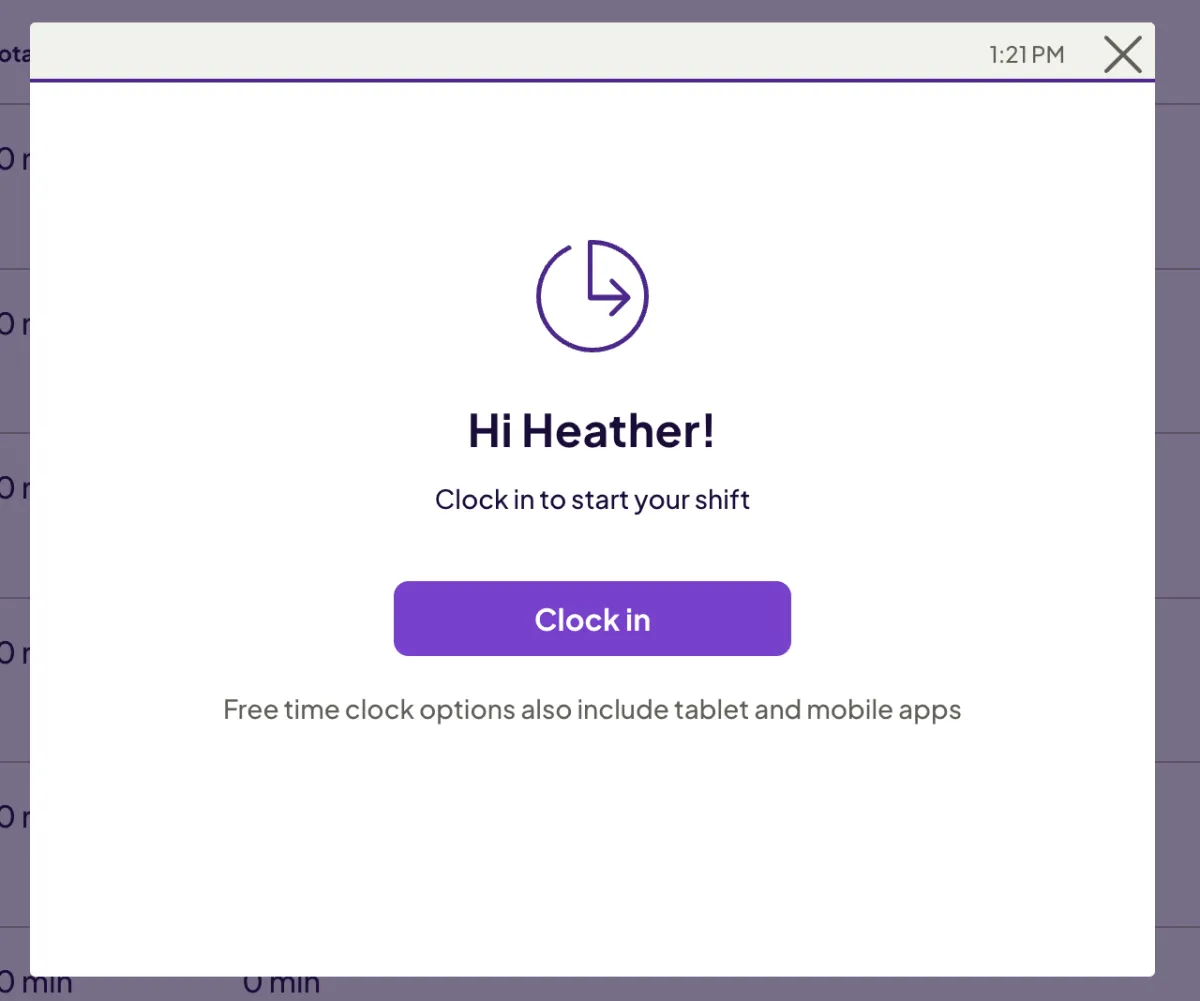
1. Clock in when you start working
2. Clock out when you stop
3. Clock out and back in for lunch
4. Do not start working until Homebase is set up.
When you are ready to start work each day, you will go to https://app.joinhomebase.com/
II. Homebase Onboarding
Objective: Add new employees to Homebase, set their roles, salary, and enable time tracking.
Steps:
1. Login
o Go to Homebase and log in with your credentials.
2. Navigate to Team Roster
o Click Team → Roster.
3. Add a New Team Member
o Click Add Team Member (top-right corner).
o Enter employee details:
▪ Name (e.g., Tim Medina)
▪ Phone number
o Check the box Invite employee to Homebase.
4. Assign Role and Salary
o Select the role (e.g., Admin Assistant).
o If salaried, calculate hourly rate:
Hourly Rate=Annual Salary52 weeks×40 hoursHourly Rate=52 weeks×40 hoursAnnual Salary
Example: $60,000/year → $28.84/hour.
o Set the Start Date.
5. Send Invite
o Click Add Team Member.
o The employee receives an email to join Homebase.

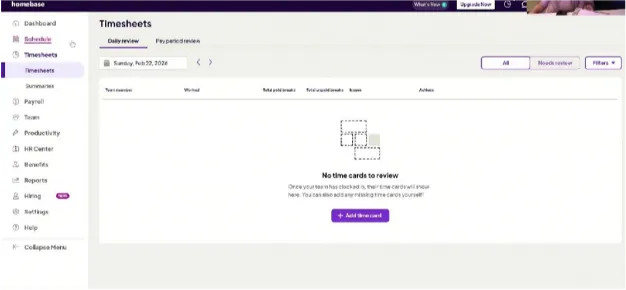
6. Employee Time Tracking Instructions
o Log in to Homebase daily.
o Navigate to Time Sheet → Add Time Card.
o Enter:
▪ Name
▪ Clock-in time
▪ Lunch break (if applicable)
▪ Clock-out time
o Submit time card at the end of the week for payroll processing.
II. Slack Onboarding
Objective: Add new employees to Slack and relevant channels.
Steps:
1. Login
o Open Slack → Navigate to Entree Business Network.
2. Invite Employee
o Click Invite People.
o Enter the employee’s email address.
3. Select Channels
o Assign channels based on the role, e.g.:
▪ #admin
▪ #time-off
▪ #todo-lists
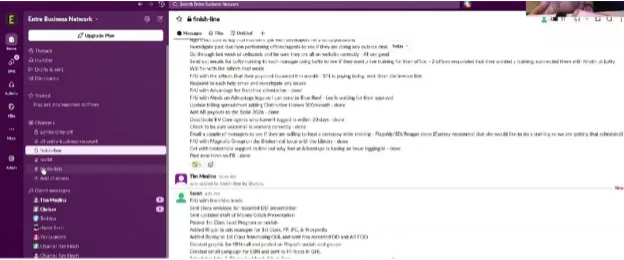
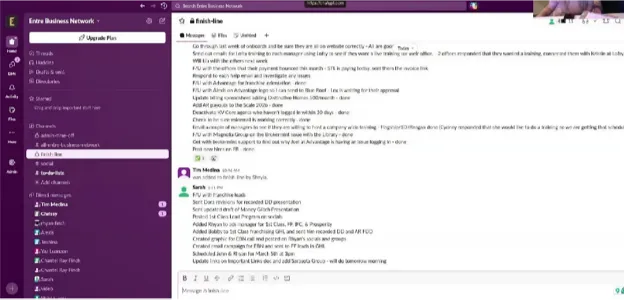
▪ #finish-line
4. Send Invite
o Click Send → Done.
o Employees have 30 days to accept the invite and log in.
III. GoHighLevel Onboarding
Objective: Add new employees to GoHighLevel and manage access permissions.
Steps:
1. Login
o Go to GoHighLevel → Ensure the correct account is selected (if multiple).
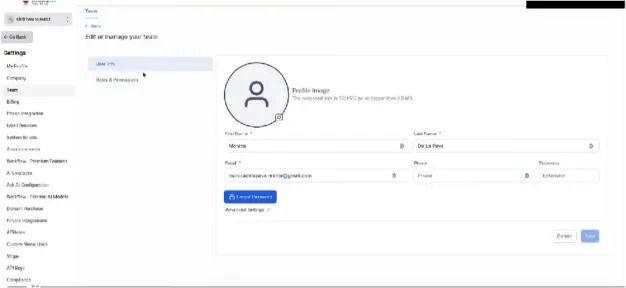
2. Add New User
o Click Settings (bottom left) → Team → Add User (top-right).
o Enter employee details:
▪ Name (e.g., Tim Medina)
3. Assign User Type & Permissions
o Select Agency for full access.
o Select Admin Access.
o Restrict access to sub-accounts if necessary.
o Turn off features the employee does not need.
4. Save Changes
o Click Save.
5. Delete User (if needed)
o Click Trash Can next to the employee → Confirm deletion.
Notes:
• Ensure all steps are completed before the employee’s start date.
• Confirm that the employee has received all invites and can log into Homebase, Slack, and GoHighLevel.
• Keep a checklist to track onboarding completion for each employee.
SOP: Operating the Canzel Marketing Program
Objective:
To outline the daily tasks, engagement requirements, and payout procedures for participants in the Canzel Marketing Program.
1. Program Overview
The Canzel Marketing Program is a monthly engagement initiative. Participants earn $0.25 per account per day for interacting with content on designated social media accounts.
• Number of Accounts: 12
• Daily Engagement Requirement: 1 like + 2 comments per account
• Monthly Maximum Earnings: $90 (based on 12 accounts × 30 days × $0.25)

2. Accounts and Platforms
Participants are required to engage with the following platforms for each profile:
1. Facebook
2. Instagram
3. [Other accounts as specified – update with links]
Note: Each day, interactions should be with a different post on each plaVorm.
3. Daily Engagement Procedure
1. Login:
o Access your assigned Facebook account (or other platforms as instructed).
o Ensure all 12 program accounts are available for engagement.
2. Engage with Posts:
o For each profile:
▪ Like one post.
▪ Comment twice:
▪ One comment can be an emoji.
▪ One comment should be text-based (e.g., “Sign me up” or relevant content).
o Example for engagement:
▪ Post about Zoom call:
▪ Like
▪ Comment 1: “👍”
▪ Comment 2: “Sign me up!”
3. Repeat for All Profiles:
o Complete the above steps for all 12 accounts daily.
o Ensure posts engaged with are different each day.
4. Tracking Engagement and Payouts
1. Tracking:
o Maintain a record of daily engagement for all participants.
o Use the tracking tab to record completed actions.
2. Payouts:
o Paid on the first business day of each month.
o If the first day falls on a weekend, payouts occur on the next business day.
o Each participant receives $0.25 per account per day.
3. Example Calculation:
o 12 accounts × $0.25 × 30 days = $90/month per participant
5. New Participant Onboarding
1. Sign-Up:
o New participants express interest in joining the program.
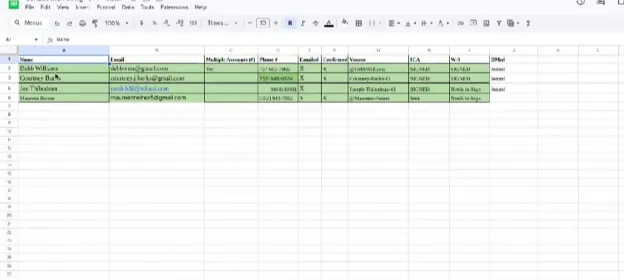
2. Documentation:
o Send W-9 form and signature pages for tax and payout purposes.
o Ensure all required information is received before adding them to the engagement tracking list.
3. Adding to System:
o Record new participants in the engagement tab.
o Begin tracking their daily activity and prepare for payout.

6. Tax and Annual Procedures
• At the end of the year, ensure all participant W-9 forms are collected.
• This prevents the need to chase participants for tax information during annual reporting.
Notes and Best Practices
• Begin each day by engaging with all profiles for maximum efficiency.
• Use varied comments to maintain authenticity.
• Confirm that all daily interactions are logged to prevent payout errors.
How to Clock in and Clock out
Purpose
To ensure consistent daily operations, proper time tracking, task transparency, and smooth team communication.
Tools Used
• Homebase
• Slack
1. Morning Routine
Step 1: Clock In (Homebase)
1. Log in to Homebase at the start of your workday.
2. Clock in immediately upon beginning work.
3. Ensure your time is accurately recorded.
Step 2: Update Slack – To-Do List Channel
1. Open Slack.
2. Go to the #to-do-list channel.
3. Post your planned tasks for the day.
o Include all current priorities.
o Be clear and specific.
4. Begin working on the listed tasks.
This keeps the team informed about what you're working on.
2. Daily Priority Task – Marketing Program
The first task every day is managing the marketing program.
Daily Marketing Actions:
1. Open all 12 designated marketing accounts/sites.
2. For each account:
o Find a recent post.
o Leave:
▪ 1 Like
▪ 2 Comments:
▪ One emoji comment
▪ One regular written comment
3. Repeat for all 12 accounts

Once completed:
• You may log this in the #finish-line channel immediately OR
• Include it in your end-of-day completion summary.
3. Midday Procedure (Lunch / Stepping Away)
Clocking Out for Lunch
1. Clock out in Homebase when taking lunch.
2. Clock back in when returning.
Slack Status Update
Post in Slack:
• “Taking lunch”
• “Be right back”
• Or similar message
This prevents interruptions during your break.
4. Throughout the Day
• Continue working through your #to-do-list items.
• As tasks are completed:
o You may post them immediately in #finish-line
o This helps reduce end-of-day workload.
o It also keeps management updated in real time.
5. End-of-Day Routine
Step 1: Update Slack – Finish Line Channel
1. Go to #finish-line.
2. Post all completed tasks for the day.
o Include marketing account management (if not already posted).
o Include all finished items. This ensures:
• Visibility of completed work
• No need for follow-ups asking what was done
• Clear tracking of team productivity
Step 2: Clock Out (Homebase)
1. Return to Homebase.
2. Clock out for the day.
3. Confirm:
o Start time
o End time
o Lunch duration
o Total hours worked

SOP: Managing User Roles and Permissions
Purpose
To provide clear instructions on how to manage user roles and add sub-accounts in the system, ensuring correct access levels for all users.
Scope
This procedure applies to all admins responsible for managing user accounts and permissions.
Procedure
1. Access Roles and Permissions
1. Log in to the admin account.
2. Navigate to Roles and Permissions in the main menu.
2. Update User Role
1. Locate the user whose role you want to modify.
2. If you want to change a user from Admin to User for a specific sub-account:
o Select the User Role dropdown.
o Change the role from Admin to User.
3. Add a Sub-Account
1. Click Add Sub-Account.
2. Search for the user by name (e.g., "Monica").
3. Select the appropriate account from the search results.
4. Click Save to grant access.

4. Verify Access
1. Scroll through the user list to confirm the role changes.
2. Ensure the user has access to the correct accounts:
o Primary account (as Admin or User)
o Sub-account (as User or Admin, depending on the settings)
Notes
• Users can have multiple roles across different sub-accounts.
• Always double-check the email and account before saving to prevent access errors.
SOP: How to Send an NDA for Signature Using
HelloSign (Dropbox Sign)
Purpose
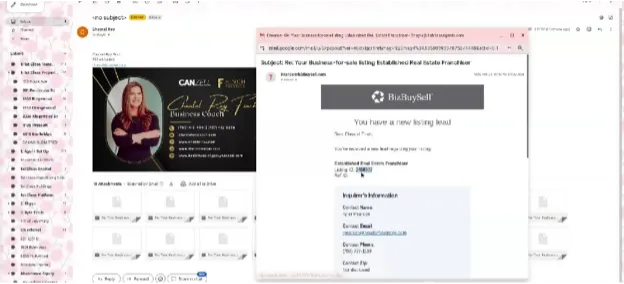
To outline the step-by-step process for sending a Confidentiality Disclosure Agreement (NDA) to a prospective buyer for electronic signature using HelloSign (Dropbox Sign), specifically for BizBuySell inquiries.
Scope
This procedure applies to all team members responsible for sending NDAs to leads who inquire about business listings via BizBuySell.
System Used
• HelloSign (Dropbox Sign)
Procedure
Step 1: Log In and Upload the NDA
1. Log in to HelloSign (Dropbox Sign).
2. Click “Sign Documents.”
3. Select “Upload.”
4. Navigate to the saved NDA file:
- Confidentiality Disclosure Agreement
5 . Click Open.
6. Once the document loads, click Next.
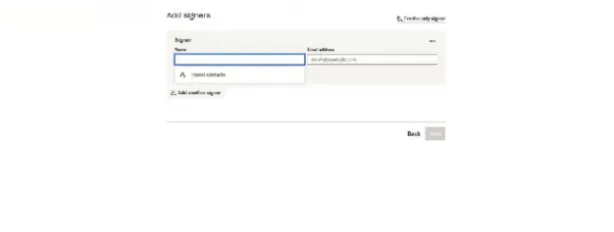
Step 2: Add Signer Information
1. In the Signer Email field:
- Enter the buyer’s contact email (from the BizBuySell inquiry).
2. In the Signer Name field:
- Enter the buyer’s full name (e.g., Tyler Pearson).
3. Do NOT delete the email address.
4. Click Next.
Step 3: Place Required Fields in the Document
You will now assign fillable fields to the document.
A. Name Field
• Place a Full Name field where the signer needs to enter their first/full name.
B. Contact Information Fields
Use Text Box fields for:
• Phone number
• Street address
• City
• State
• ZIP code
• Email address
• Any financial qualification fields (if applicable)
Tip: Once you position one textbox, the next will paste in the same size for consistency.
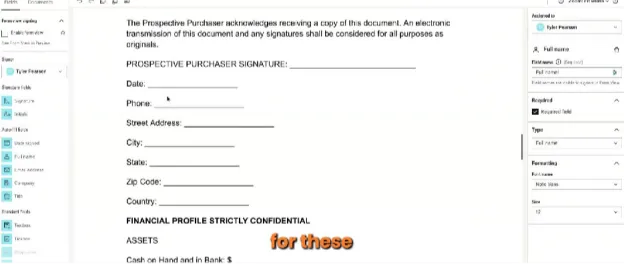
C. Date & Signature Fields
• Add a Date field in the appropriate section.
• Add a Signature field where required.
• Ensure all required sections are assigned to the signer.
Step 4: Insert Listing ID (Important Step)
This step ensures proper tracking without disclosing confidential information.
1. Locate the section labeled Listing Number in the NDA.
2. Switch the signer role to “Me” (if needed).
3. Insert a Text Box in the Listing Number section.
4. Enter the specific Listing ID from BizBuySell.
- This identifies which listing the buyer is inquiring about.
5. Switch the signer role back to the buyer if necessary.
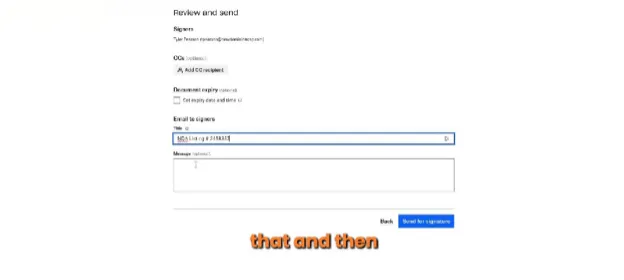
Step 5: Review and Send
1. Click Next.
2. In the message section, enter:
Subject/Title Example:
NDA – Listing [Insert Listing ID]
Message Example:
Please sign at your earliest convenience.
3. Click Send for Signature.
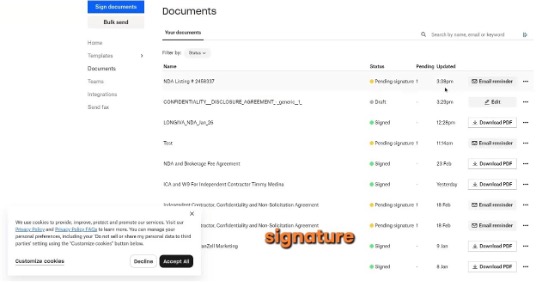
Step 6: Confirm Submission
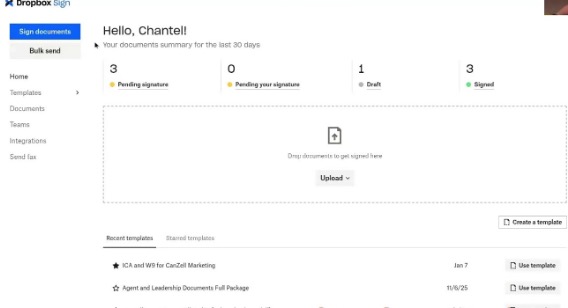
1. You will be redirected to the homepage.
2. Verify:
o A notification banner confirms the signature request was sent.
o The document appears as “Pending – 1 Signature.”
o Timestamp reflects the date and time sent.
Important Notes
• Do not disclose any business information until the NDA is fully signed.
• Always confirm the correct Listing ID before sending.
• Ensure all required fields are properly assigned to avoid delays.
• This process is specifically for BizBuySell leads but may be adapted for other sources if needed.
Outcome
The buyer receives the NDA electronically and must complete all required fields and provide a signature before business details are shared.
SOP: Using Quo (OpenPhone) to Respond to Leads
Purpose
To standardize the process of responding to leads from social media, ensuring messages are personalized, engaging, and compliant with anti-spam rules.
Tools Needed
• Quo (OpenPhone) account
• Leads database (with first name, last name, email, phone)
• Cancell Cloud: https://canzcloud.com/responses
• Optional: ChatGPT for alternate message phrasing
Procedure
1. Collecting the Lead
1. Access the lead from your social media platform (e.g., Facebook ads).
2. Copy the following information:
o First Name
o Last Name
o Phone Number
o Email (if available)
2. Initiating a Conversation in Quo
1. Open Quo.
2. Click “Send a Message” to start a new conversation.
3. Paste the lead’s phone number.
4. Add their first name.
5. Click “Create” to start the conversation.

3. Preparing Your Message
1. Go to Cancell Cloud → Responses.
2. Select the appropriate lead response based on the ad or campaign (e.g., St. Regis Mastermind).
3. Review rules for messages:
o No duplicate texts: Each message must be unique.
o Add the lead’s first name.
o Short and conversational: End with a question to encourage response.
o No dashes: Replace with dots, commas, or rephrase.
o Friendly tone: Avoid overly salesy language; text like a friend.
4. Customizing the Message
1. Insert the lead’s first name at the beginning.
2. Paste the pre-written verbiage from Cancell Cloud.
3. Insert the relevant link at the end of the message (sign-up or info page).
4. For subsequent leads from the same campaign, alter the message slightly to avoid duplication:
o Reword sentences.
o Change adjectives or phrasing.
o Use ChatGPT if needed to create variations.
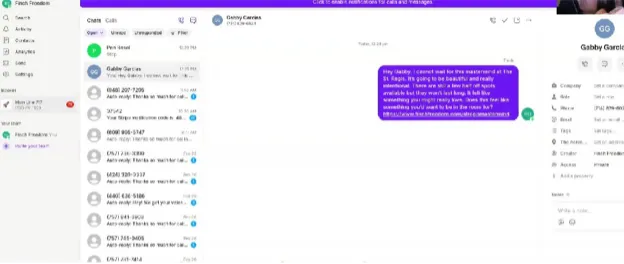
Example:
Hey Gabby, cannot wait for this mastermind at the St. Regis! It’s going to be a really intentional experience. There are a few half-off spots available — would love to see you there! [link]
5. Sending the Message
1. Review the message for personalization and clarity.
2. Ensure the link is included at the end.
3. Click Send.
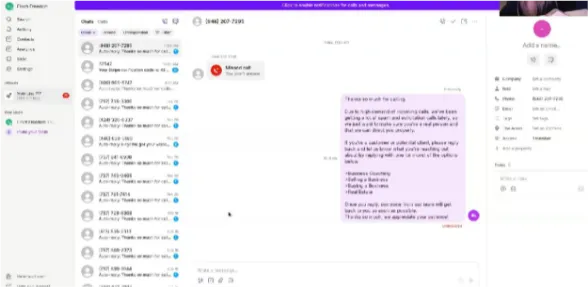
6. Follow-Up
1. If a lead does not respond within 1–2 days:
o Send a friendly GIF via Quo to gently remind them.
o Avoid messages that could seem rude or pushy.
o Example: a funny “call me” GIF.
2. If a lead responds with “stop”, do not send additional messages.
3. For leads that respond positively, continue the conversation:
o Ask why they’re interested.
o Provide the corresponding link as needed.
7. Handling Incoming Calls
1. Quo bot answers initial calls automatically.
2. Respond personally when needed:
o Ask the caller about their inquiry.
o Provide the relevant link.
Rules Summary
• Personalize each message (use first name).
• Avoid duplicate messages.
• Keep messages friendly, short, and conversational.
• End with a question to encourage engagement.
• Replace dashes with other punctuation to avoid spam detection.
• Respect requests to stop messaging.
Slack
Slack is how the team communicates internally.
1. When you get your Slack invite:
1. Open the email
2. Join the workspace
3. Set your password
4. Add your full first and last name
5. Upload a professional profile photo
6. Once you’re in, keep Slack open while you’re working.
2. TO-DO LIST AT THE START OF THE DAY
This is where you share what you plan to work on today.
Each morning, after clocking in:
1.Go to the To-Do List channel
2.Post a list of what you plan to work on that day
3.This helps everyone stay aligned and avoid duplicate work.
3. ADMIN TIME OFF (WHEN YOU STEP AWAY)
This channel lets the team know when you’re not at your computer.
Post when:
1. You’re taking lunch
2. You’re stepping away
3. You’ll be unavailable for a bit
4. What to include
5. That you’re stepping away
6. About how long you’ll be gone
4. FINISH LINE (END OF DAY)
This is where you share what you completed today.
What to do
Before you log off:
1. Go to the Finish Line channel
2. Post the tasks you finished that day
3. Only include things that are fully done.
4. Example
5. Completed marketing engagement program
6. Posted in Facebook groups
7. Followed up with leads
8. This gives the team a clear picture of progress.
Dashlane
Dashlane Stores Login Info
1. GETTING SET UP IN DASHLANE
You will receive an email invite to Dashlane.
What to do:
1. Open the Dashlane invitation email
2. Accept the invite
3. Create your Dashlane master password
4. Log in successfully
5. Your master password is important.
6. Do not share it with anyone.
2. WHAT DASHLANE IS USED FOR
Dashlane stores login information for tools you may need, such as:
Software platforms
Websites
Shared accounts
Business tools
If you are given access to a system, the login details may already be saved in Dashlane.
Dashlane allows us to securely store, generate, and share login credentials without exposing passwords in email, text, or messaging platforms.
Social Media
Facebook Ads Training
To ensure brand consistency and platform compliance, you are required to complete our Facebook Training before accessing or managing any company Facebook assets.
Please complete the full training at the link below:
[Insert Facebook Training Link Here]
Facebook Training
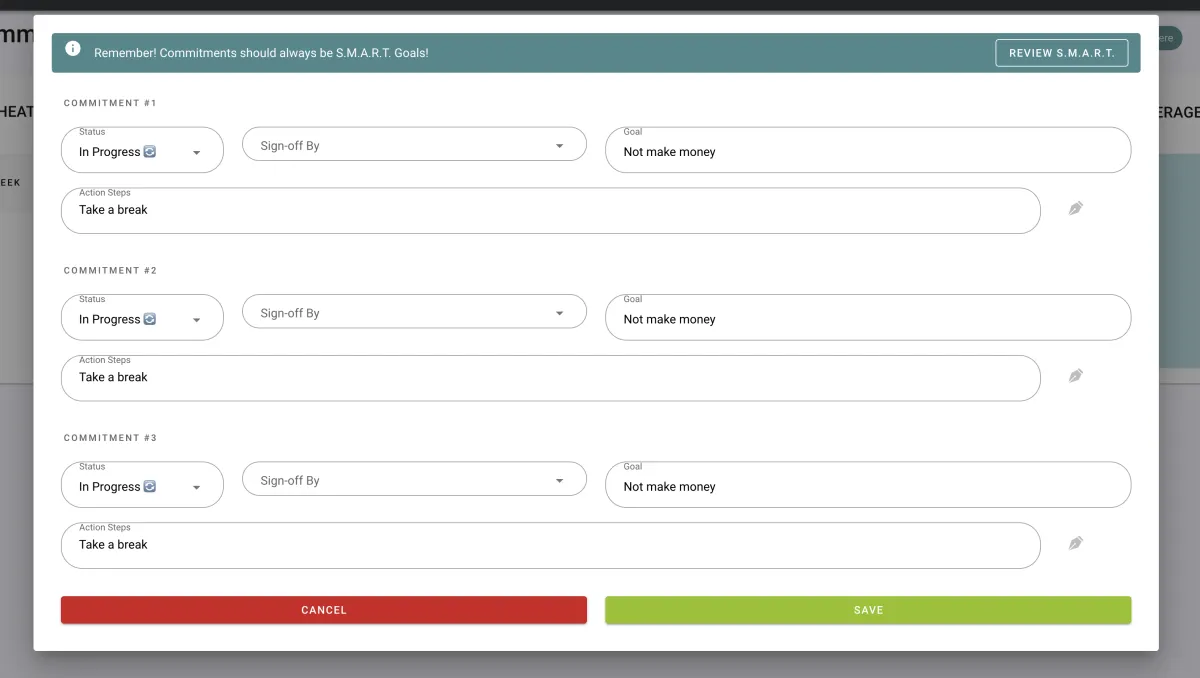
When you go to set your commitments each week, you will click on the “My Commitments” tab on the left hand side.
ManyChat Training
The training will cover platform navigation, flow building, triggers and conditions, tagging and segmentation, integrations, testing procedures, and escalation protocols. You are not authorized to publish, edit, duplicate, or activate any flows until training is completed and approval is given.


You will now click on the pencil button and put in your 3 commitments for the week. This will include your Goal and Action Items for each. Remember they need to be actionable, measurable and specific. Once you have completed them, you will change the status of your commitment to completed.
SOP: PROCESS FOR MANAGING DAILY FACEBOOKGROUP POST
Purpose
To ensure consistent daily engagement, value delivery, and promotion across all company- managed Facebook groups while maintaining quality control and community standards.
Facebook Groups Covered
• KSL Business Broker
• Sarasota Business Network
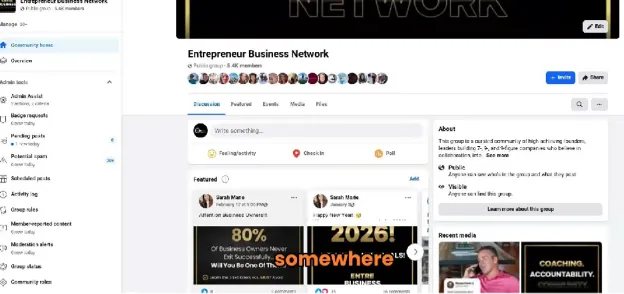
• Entrepreneur Business Network
• Health Wealth and Godly Wisdom Group
Daily Responsibilities Overview
Each group must:
• Receive at least one post per day
• Include either:
o Value-driven content, OR
o Promotional content related to our services
• Have active engagement (likes/comments)
• Be moderated (approve/decline posts)
• Have membership requests reviewed
Step-by-Step Process
1. Create Daily Post Content
A. Identify Content
• Look for posts you like (inside or outside the group).
• Copy the link or wording if useful.
• Use ChatGPT to:
o Reword existing verbiage
o Create new captions from a graphic
o Generate a graphic using existing verbiage
o Improve clarity or engagement tone
B. Finalize Post
• Ensure:
o Messaging is clear
o Grammar is correct
o Graphic matches the caption
o Tone fits the specific group
2. Post in Each Group Important Rules:
• Do NOT use identical wording in every group.
• Customize each post slightly.
• Ensure the post fits the audience of that group.
Posting Steps:
1. Enter the group.
2. Upload the graphic (if applicable).
3. Paste finalized caption.
4. Proofread.
5. Click Post.
3. Tag Group Members
Immediately after posting:
• Comment: @everyone
• This notifies all group members and boosts visibility. Ensure tagging aligns with group settings and policies.
4. Engage with Other Members' Posts
Daily engagement checklist:
• Scroll through recent posts.
• Like relevant posts.
• Leave thoughtful comments.
• Support posts from team members (e.g., Ryan, Chantel, business page).
• Engage with non-team posts to boost group activity. Goal:
• Show consistent presence
• Encourage community participation
• Increase algorithm visibility
3. Moderate Group Content
For groups you manage (especially local groups like Sarasota Business Network):
A. Approve Posts That:
• Are relevant to business owners
• Are local (if group is location-specific)
• Provide value
• Are not overly sales-heavy
B. Decline Posts That:
• Are unrelated (e.g., karaoke events not business-related)
• Are overly “servicey” or aggressive sales posts
• Do not align with group purpose
• Appear spammy
All Things Outlook
Go to canzellportal.com
Search for email signature flares and click the corresponding button.
Review and ensure that your information is correctly input (first name, last name, email, phone number, title, etc.)
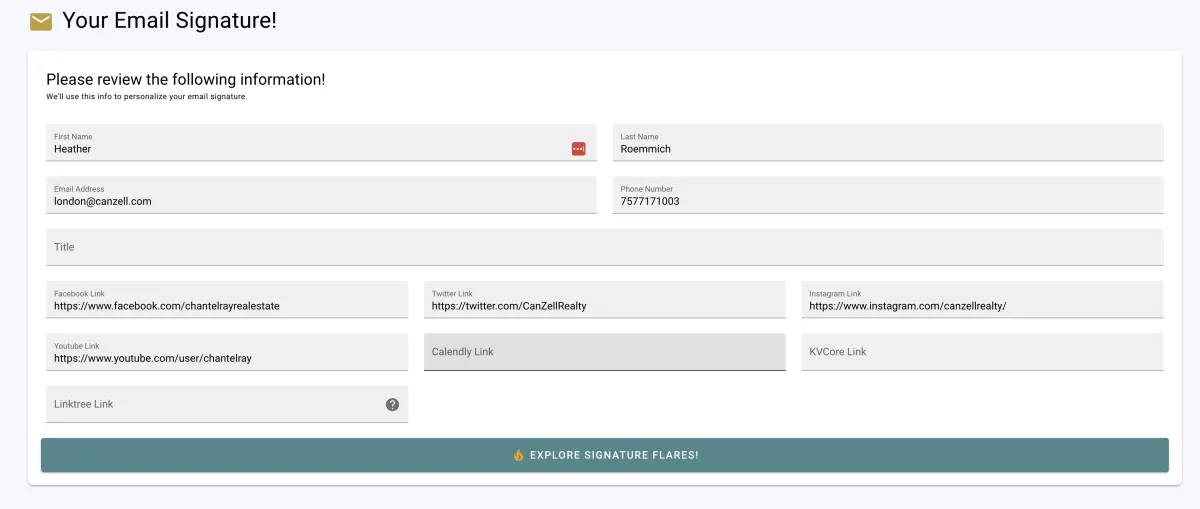
Click “Explore Signature Flares”
Choose the signature flare that you like and click the green button to copy the email flare to your clipboard
Go to Exchange Admin Panel and Click on Active Users.
Find the user you want to change the password. Click on Reset password. You can select the option where you set the password you can you check or uncheck the box that will require them to change it when they log in. Send them the new password.
To update the authenticator, scroll down the left had side of the admin page and click on all admin centers. Click on Identity. Click on users and find the user you want to update. Click on authentication method. Update the phone number and email address. Click Save.
Adding Users to “Everybody” Email Group
1. Access Teams and Groups
· In the admin center, go to Teams and Groups.
· Select Active Teams and Groups.
2. Locate the “Everybody” Group
· Search for the “Everybody” group.
· Click on the group name to view its details.
3. Add New Members
· Go to the Membership section.
· Click Add Members.
· Search for the newly invited guest user.
· Confirm their addition to the group.

Teams & Zoom
When sending out a calendar invite, you will want to remove the option to send a Teams link – since we use Zoom and it confuses people.
Make sure your settings are correct. Once your settings are correct, you won’t have to worry about it again.
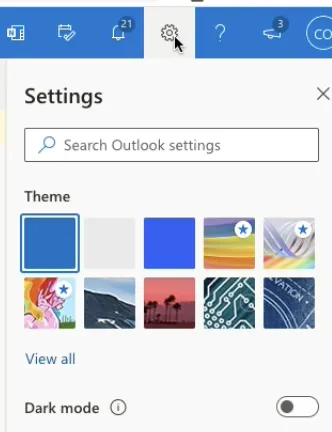
While in your online option for your email in Outlook, you will click on the gear in the top right corner. Then click to open outlook settings.
Once in, click on Calendar on the left and then “Events and Invitations”
Make sure that the box next to “Add Online Meeting to all Meetings” is UNCHECKED.
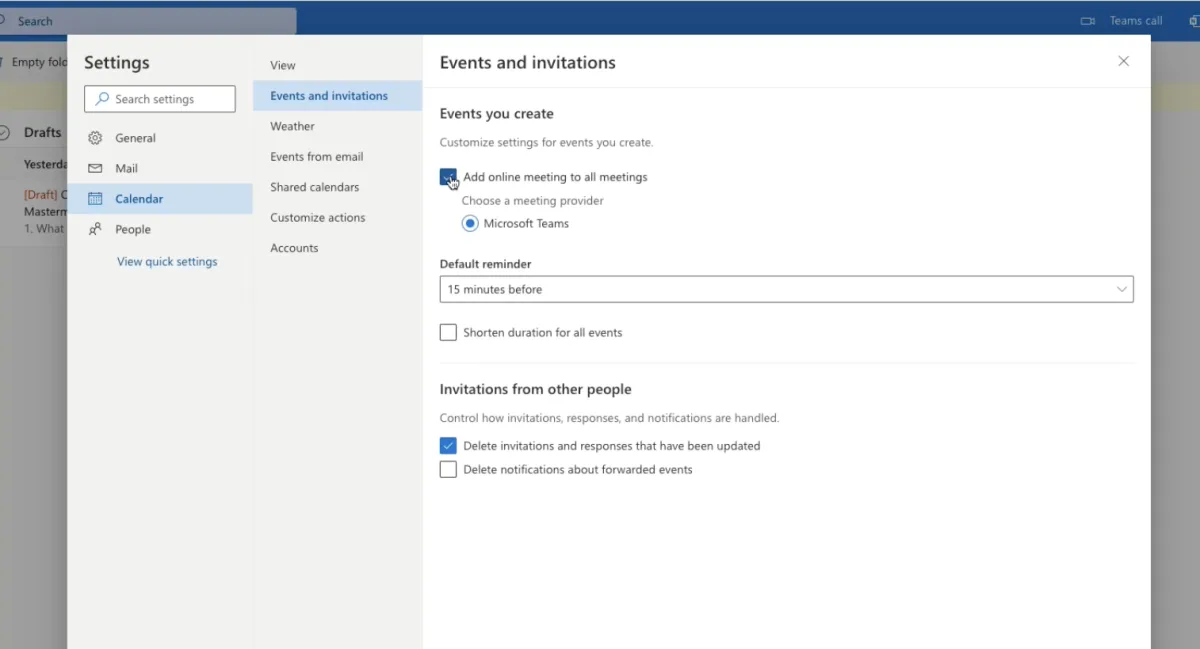
Click Save and you are good to go!
Accessing and Managing Zoom Recordings
Objective:
To guide users on how to access Zoom recordings, download video/audio files, and manage transcripts efficiently.
Scope:
This SOP applies to all team members who need to retrieve Zoom recordings and transcripts from the master Zoom account.
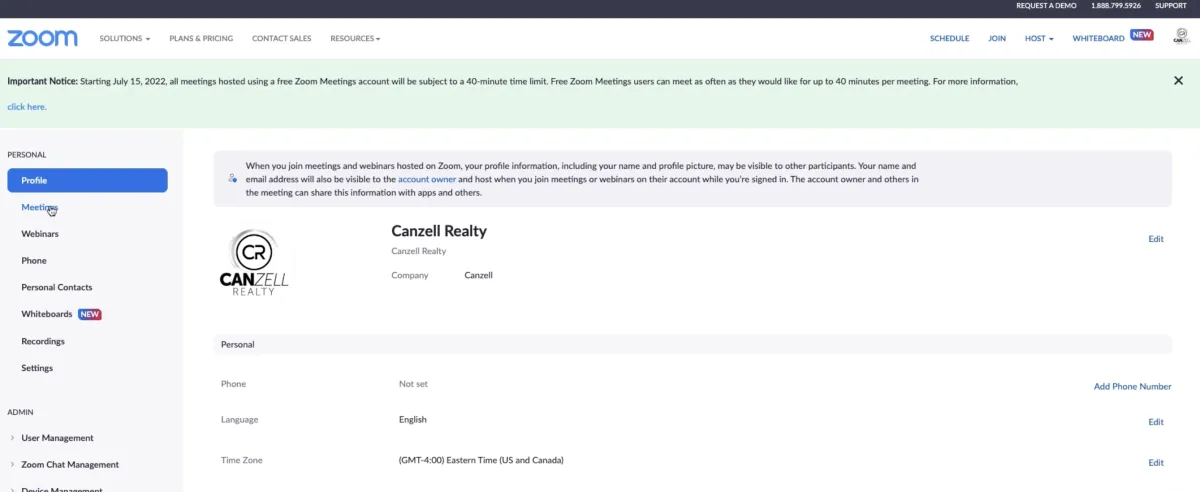
Step 1: Log in to Zoom
1. Go to Zoom and log in using the master Zoom account credentials.
2. Once logged in, click your profile icon in the top left corner.
3. Select My Profile from the dropdown menu.
This will take you to the backend where all recordings, transcripts, and account settings are managed.
Step 2: Access Recordings and Transcripts
1. On the left-hand menu, locate and click Recordings (or Recordings and Transcripts
depending on your Zoom interface).
2. This opens a list of all recordings associated with the account.
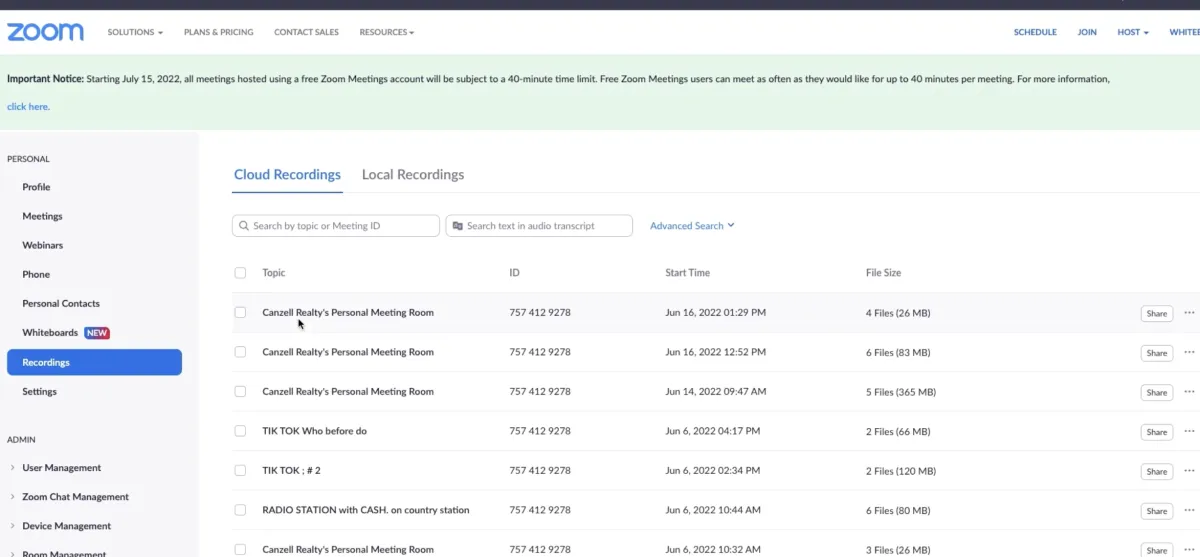
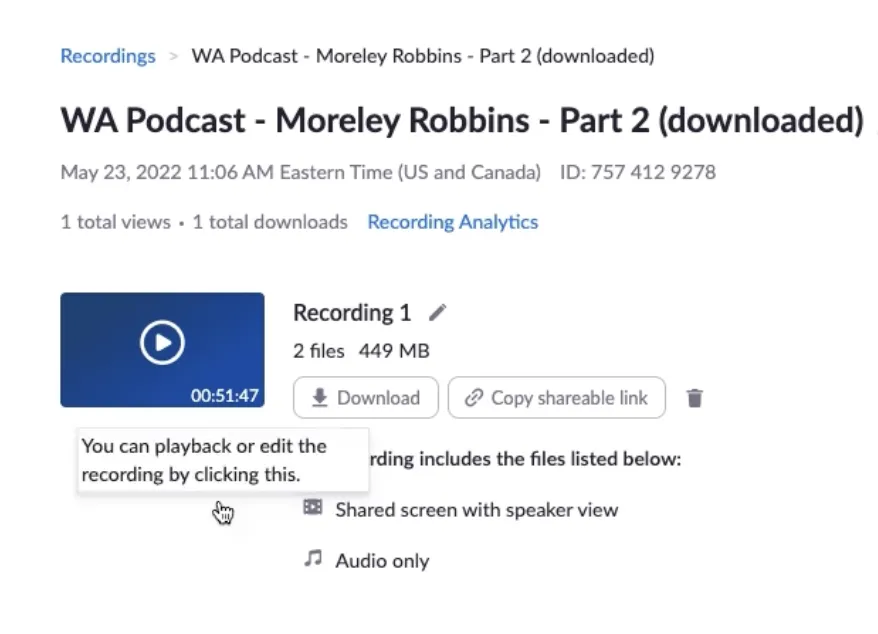
Step 3: Select a Recording
1. Click on the recording you want to access.
2. The recording details page will display the following:
- Video with speaker
- Audio-only file.
Step 4: Download Audio/Video
Once you click on the recording, you can click on the Download button, or you can copy the link via email.
*Note: If you use the share option, make sure you either take the passcode off, or send the passcode with the link.